Note that this is a very old post.
I’ve been using Windows 10 for almost a month now and I’m very impressed with it. I’ve not had a single crash, and every piece of software I have works on it.
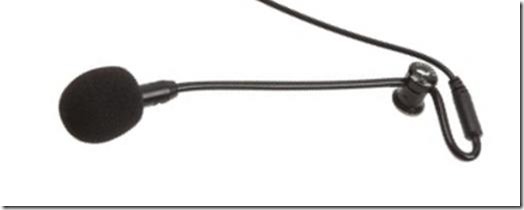
Something I want to start making more use of is speech recognition and speech-to-text (for dictation purposes). I looked around for a decent headset (headphones + microphone), but I couldn’t find one I liked. To be honest, their appearance put me off more than anything, with the boom microphones just looking like flat strips of plastic. I was really after something like my Sennheiser HD 205 phones, but with a mike fitted. And then I thought: why not fit a separate mike to my Sennheisers?
After some searching I came across the AntLion ModMic. I checked out the reviews and decided this was the way to go, and a little more searching revealed that it is distributed by several companies in the UK. I chose LimeXB because they had the lowest price).
Once I’d fitted it – and it fits well – I started testing it. The first thing I noticed was that the sound level from the mike was very low. Windows could pick it up, but it was advising that I either speak up (which could have resulted in my lungs being expelled from my body, since I was already shouting), or move the mouthpiece nearer my mouth (which at that point in my testing would probably have meant inside it).
I’ve been through all this before with Windows. It’s not an actual fault with either hardware or software. It’s a settings issue. And I discovered that Windows 10 has a setting I’ve never seen before which fixed the problem immediately. Here’s what to do.
Click Search and type “sound”, then press enter. This opens up the Hardware & Sound app. Alternatively, open the Control Panel and select the app from there, then click on Sound. This dialog box (or similar – you may see different devices listed) appears:
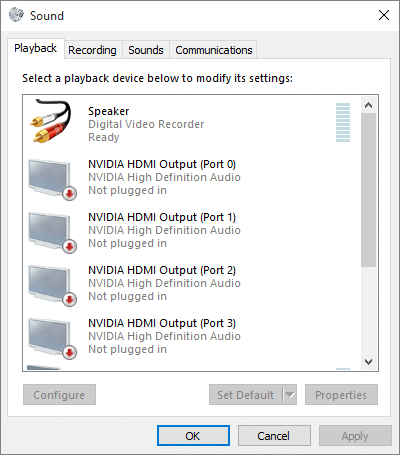
Click the Recording tab and you see this (again, you might have different devices listed):

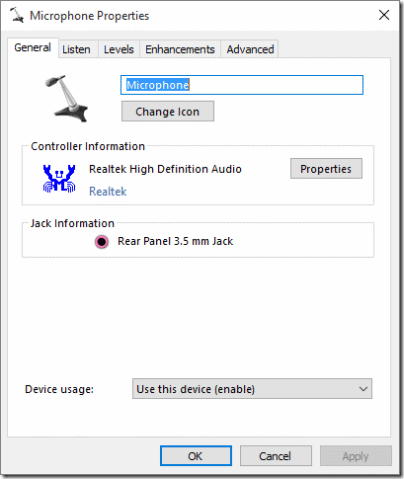
Double-click the Microphone device and this dialog appears:
Now click the Levels tab and you will see this:
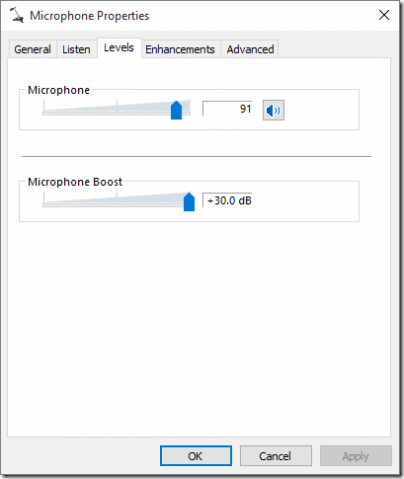
You’ll probably find first of all that the Microphone level is set to less than 100% (mine had defaulted to 80%). Set this to maximum. The interesting one is that Microphone Boost slider – I’m sure I never saw that in Windows 7 or earlier versions, though I’ve not really bothered with using a mike much in the past. Set this to maximum, too. Then click OK to close all the dialog boxes.
You should now find that your microphone is ultra-sensitive. You may even have to adjust the boost to a lower setting as it might be too sensitive, but you can do that as needed.
I’m just getting to grips with Windows 10’s speech recognition. Even without any training (the computer needs to learn how you speak) I can open, close, and manipulate various apps. And dictation (which IS going to need some training) looks like it could be great fun.
How do you pin microphone levels to the task bar?
I’m not sure exactly what you mean, but they’re already pretty much there. If you look at the end of the task bar, you’ll see the speaker icon. Right-click it and you’ll get a menu like this (note that I have my task bar on the side of my screen):
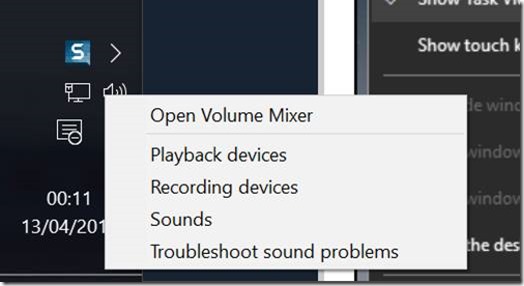
If you select Recording devices it takes you straight to the dialog box with the Recording tab I discussed above.